> For the complete documentation index, see [llms.txt](https://docs.truvera.io/llms.txt). Markdown versions of documentation pages are available by appending `.md` to page URLs; this page is available as [Markdown](https://docs.truvera.io/truvera-workspace/create-a-design.md).
# Create a design
## Create a new design
Select Designs and click Create Design
You can choose a pre-made template or you can import an existing PDF design. Click Import PDF Credential, and select the PDF file.
{% hint style="info" %}
Ensure your PDF credential template is:
* A max of 2 MB
* A4 size: 21.0 cm wide x 29.7cm high (portrait) and 29.7 cm wide and 21.0 cm high (landscape)
* If you’re exporting from Canva, be sure to flatten PDF when exporting the template in PDF format
{% endhint %}
You can also work on a blank template and add the elements and attributes on a blank page in the designer.
## Add elements
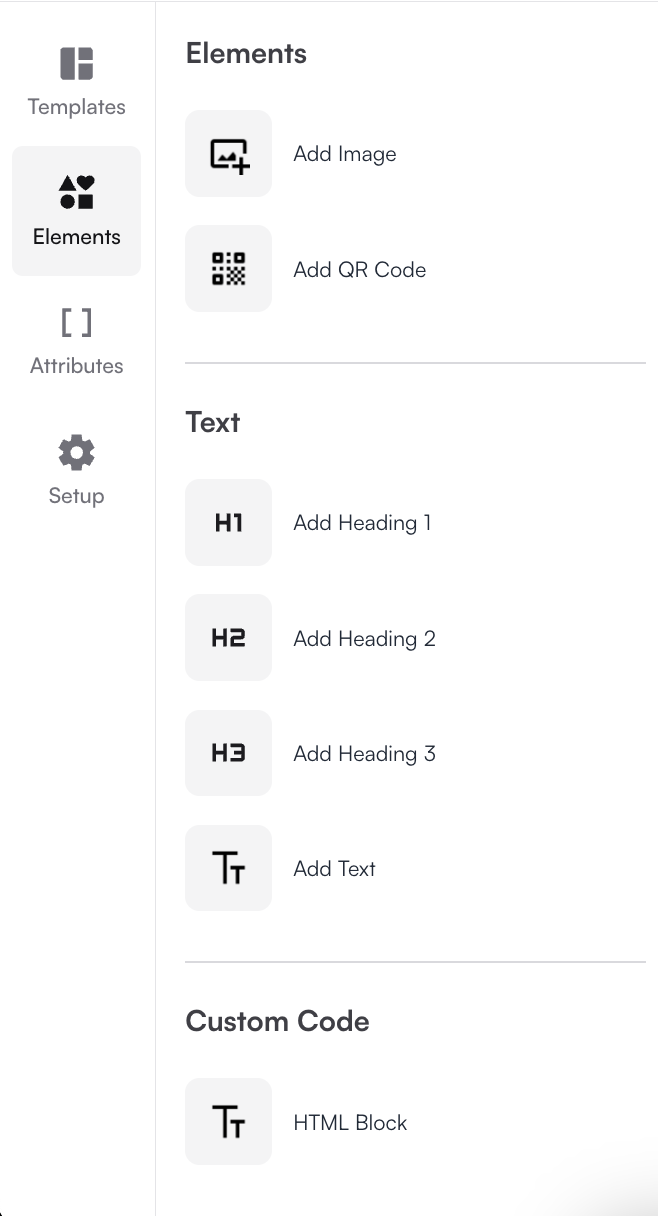
You can add images, QR Code, Text fields and HTML Blocks to customise your credential design.
Select **Elements** and choose the elements you need. Once they are placed on the design template drag\&drop them in the desired location.
## Add certificate attributes
You can choose which certificate attributes you want to appear on your template. The actual attribute details will be filled in on the issued credentials.
To add specific fields on your template, select Attributes in the menu then choose which details you would like to appear.
{% hint style="info" %}
Subject refers to the recipient or item that the credential is being issued to.
{% endhint %}
If you want your organization’s logo (Issuer Logo) and description (Issuer Description) to appear on your credential, you have to fill out those details in your [Organization Profile (DIDs).](/truvera-workspace/create-an-organization-profile-did.md)
## Other settings
You can use your brand color for the design background. Chose it by changing the background colour in **Setup.**
You can also add a custom background image. To add a background image for your design go to Setup and click **Add Background Image.**

---
# Agent Instructions
This documentation is published with GitBook. GitBook is the documentation platform designed so that both humans and AI agents can read, navigate, and reason over technical content effectively. Learn more at gitbook.com.
## Querying This Documentation
If you need additional information that is not directly available in this page, you can query the documentation dynamically by asking a question.
Perform an HTTP GET request on the current page URL with the `ask` query parameter, and the optional `goal` query parameter:
```
GET https://docs.truvera.io/truvera-workspace/create-a-design.md?ask=&goal=
```
`ask` is the immediate question: it should be specific, self-contained, and written in natural language.
`goal` is optional and describes the broader end goal you are ultimately trying to accomplish on behalf of the user. GitBook uses it to tailor the answer towards what is most useful for that goal.
The response will contain a direct answer to the question and relevant excerpts and sources from the documentation.
Use this mechanism when the answer is not explicitly present in the current page, you need clarification or additional context, or you want to retrieve related documentation sections.